Showing posts with label Stamp Set - Teeny Tiny Wishes. Show all posts

Friday, December 12, 2014

FM188 Winter Themed Gold/Silver Project

This week at the Friday Mashup I created a fun Box Chain Wreath! However I felt like I was cheating because the "Gold" on my Wreath was so minimal. So I set out do create a card with silver or gold but then struggled to incorporate any so all I had was silver rhinestones. With two "failed" attempts at mashing up the challenge I gave in and have decided to share both with you.


Here's this week's Friday Mashup Challenge:

1. Create a project using "Silver or Gold". 
2. Create a "Christmas Project". 

3. or Mash it Up! and create a "Christmas-themed Project with Silver or Gold".


I took the idea for my reindeer from Pinterest. You can find the pin I used here.
Thank you Jacquii McLeay for the inspiration!


Do you recognize the "Joy" on my wreath? You are right, it's from the Wonderous Wreath Framelit set, but it has been blown up!! My wreath is 12" in diameter so there is no way the small joy from the framelits would fit. In came my Silhouette Cameo to the rescue!

I took a photo of the Joy cut out, imported the photo into my Silhouette Cameo Designer Software, resized it to fit my banner and cut it out three times. I layered Early Espresso, Garden Green and Cherry Cobbler joy's on top of each other to add some dimension.

The tutorial I followed for my wreath can be found on my pinterest board: http://www.pinterest.com/pin/30258628716508924/


Friday, January 31, 2014

Silly Bird Punch Art Birthday - FM145

This week over at Friday Mashup Sara has created a fantastic sketch for us. 

Here is the challenge over at The Friday Mashup this week:


1. Create a project with the sketch above
2. Create a project using sponging
3. Mash it up and create a project with the sketch above and use sponging

The moment I seen the sketch and her challenge I knew I wanted to make a punch art card. I went straight to Pinterest to find a punch art animal to CASE and found this fantastic bird from Kim Score

Here is what I came up with. 

I took some extra photos at different angles, I would love to get your feedback. Is the first photo enough, or do you like the additional photos as well?


Stampset: Teeny Tiny Wishes
Paper: Crumb Cake, Early Espresso, Very Vanilla, Basic Black, Island Indigo Core'dinations, Pool Party Core'dinations, Summer Starfruit Core'dinations
Ink: Island Indigo, Pool Party, Summer Starfruit, Crumb Cake, Early Espresso
Punches: Owl Builder, Boho Blossom, Two Step Bird Builder, 1-1/4" Circle, 1-3/8" Circle, 3/4" Circle, Itty Bitty Punch Pack, Ornament (retired), Modern Label, Word Window, 
Tools: Sponges

Sunday, January 19, 2014

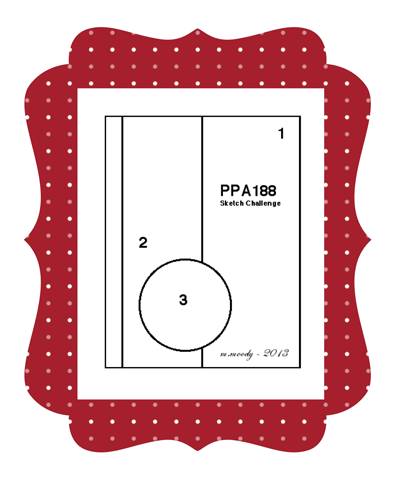
Owl Get Well Wishes PPA188

My sister and I are both sick and our misery together inspired me to create this card. I don't know if the Owl and the sentiment go together but it is exactly how I was feeling. I never knew my feelings could be expressed in my cards. 

I am going to be sending this card to my sister and since she loves Owls I know this card will brighten her day. 


The sketch I used to inspire this card was from Pals Paper Arts.


I couldn't decide which layout I liked better, what do you think?


Update: In my hast in getting this posted I forgot to give credit to Diana Gibbs for the original punch art owl inspiration. You can find her blog post here.

You can also follow me on pinterest to find many more punch art ideas.

Stampset: Teeny Tiny Wishes
Paper: Whisper White, Coastal Cabana, Crushed Curry, Smokey Slate
Ink: Coastal Cabana
Punches: Word Window, Owl Builder Punch, Two Step Bird Builder, Scallop Edge Boarder
Bigshot: Chevron Embossing Folder, Perfect Polka Dots Embossing Folder, Starburst Framelits, Circle Framelits, Window Frames Collection Framelits
Tools: uni-ball Signo Gel Pen

Friday, December 27, 2013

Holiday Update and New Years Card

The first part of my blog today is more personal than normal. If you just want to see my latest creation scroll to the end of my blog.

Christmas this year wasn't anything I thought it would be.
We had my parents over for Christmas Eve but my mom wasn't feeling well and the energy in the house seemed very low. Then on Christmas Morning when I finally called my parents at 11:30am I woke my parents up. They never stay in bed past 8:00am but they were still sleeping. I told my mom to call me when she got up and was ready to have me come over. I never heard from her throughout the whole day and they didn't answer my phone call. My mom texted me later in the evening to say she was feeling "Bad very bad. I will talk to you in the morning." This meant I found myself alone all Christmas and eating Chinese take out with my partner when he got home from work.

Yesterday I got a text from my mom telling me not to come over because she didn't want anyone else to get what they have. I really wish I could talk to my parents but the minute I had on the phone with my mom on Christmas day she didn't sound good at all. I think I will go over to see them tomorrow even if they don't want me to. If they are both very sick who is there to take care of them? I feel helpless!!!

With all this happening I still feel like I should be making Christmas cards because we haven't had our Christmas yet. However, I know I need to move on. Since I didn't have time to send out any Christmas Cards I made a batch of New Years Cards for those who sent me a Christmas Card. Below is the card I came up with. I am not entirely thrilled with the results but the more I look at it the more it grows on me.

I hope you all had a great day shopping on Boxing Day! I took the day to relax and get a stack of these cards created.


To create the starburst technique follow the steps below in the photos.

Draw lines on the back of your paper, or on a scrap paper the same size as your DSP.
If you want to create a starburst like I did here use scrap paper and cut two pieces of DSP at the same time as you cut along the lines of your scrap.


As I mentioned above, cut along all lines you drew.


Once you cut your pieces align them on your paper and adhere.

If you used alternating DSP as I did in my other card it is easy to alternate the DSP to create two cards.


Stampset: Teeny Tiny Wishes
Paper: Whisper White, Basic Black, Silver Glimmer Paper
Ink: Staz On
Punches: 3/4" Circle, Hexagon
Bigshot: Starburst Framelits, Circle Card Thinlits Die (Star), Perfect Polka Dots Embossing Folder
Tools: Magnetic Platform
Accessories:

Monday, September 30, 2013

Washi Washi Washi Halloween Close up Part 2

It is very crazy how fast a weekend can go by. It feels like I blinked and I am heading back to work. It went by so fast I cannot even remember what I did this weekend.

I hope you all had a great weekend!

Here is the last of the close up's for my 3X3 Halloween washi note cards. 


Stampset: Teeny Tiny Wishes
Paper: Basic Grey, Very Vanilla, Basic Black, Whisper White, Pumpkin Pie, Old Olive
Ink: Pumpkin Pie
Punches: Owl Builder, 1/2" Circle, 1" Circle, Large Oval, Word Window, Petite Pennants Builder, Retired Oval, 
Accessories: Witches Brew Designer Washi Tape, Uni-ball Signo Gel Pen

Wednesday, September 25, 2013

Washi Washi Washi Halloween Close Up

What a relief it is to have my class presentation over with. I think it went fairly well but as predicted my voice got extremely shaky. I just hope everyone was able to understand what I was saying. Unfortunately I won't know how well we did until the end of the class. My teacher said he won't grade us until everyone has presented. Do you think that is fair? I don't, I am worried he will compare us to everyone else and they will have had a lot more time to prepare than we did.

As promised here are some closer up photos of the 3X3 Halloween Washi cards I made a week or so ago. These cards were chosen as runner up in the Friday Mashup challenge.

Make sure to keep coming back because I will have the other cards for you. 

I will also have a very exciting announcement to tell you about October 1st so stay tuned for that as well!!!

Stampset: Teeny Tiny Wishes
Paper: Basic Grey, Very Vanilla, Basic Black, Whisper White, Pumpkin Pie, Old Olive
Ink: Pumpkin Pie
Punches: Owl Builder, 1/2" Circle, 1" Circle, Large Oval, Word WIndow, Petite Pennants Builder, Retired Oval, 
Accessories: Witches Brew Designer Washi Tape, Uni-ball Signo Gel Pen

Monday, September 16, 2013

Butterfly Pinterest CASE

I found a card on Pinterest from Sarah J. Moerman and fell in love with the layout. I couldn't wait to try it with the Stampin' Up! Elegant Butterfly punch.

You can follow me on Pinterest at http://www.pinterest.com/craftsaddicted/

Each butterfly has two or more layers with a dimensional in between each butterfly. They are also popped up on dimensionals to make the butterflies stand out more. 

Picking the DSP and embellishments was the hardest part. Once you know what you want to use this card comes together easily.

Stampset: Teeny Tiny Wishes
Paper: Very Vanilla, Crumb Cake
DSP: Epic Day This and That, Afternoon Picnic, Venetian Romance, Modern Medley, Birthday Basics, Soho Subway
Ink: Black Staz On
Bigshot: Bitty Banners, Magnetic Platform
Tools: Elegant Butterfly Punch, Bitty Butterfly Punch
Accessories: In Color Dahlias, Antique Brads, Natruals Designer Buttons, Very Vintage Designer Buttons, Neutrals Candy Dots, Candy Dot Brad Bases

Wednesday, September 11, 2013

Washi Washi Washi Friday Mashup Challenge FM126

I never thought using Washi tape could be so easy and fun!!! I had a great time creating these two sets of cards over the last two nights. I wanted to make sure to complete the cards before the challenge at Friday Mashup closed.

Friday Mashup is great because they give you not one but two challenges!!! You have a choice, take on one challenge or make a project following both challenges.

This week the challenges were, Create a project using Washi Tape, and Create a set of 3X3 quick note cards. I took this challenge head on and below is what I came up with.

Some time this week, when I can take a picture in the sun, I will provide you with a close up of each card.


Stampset: Petite Pairs, Oh Goodie, A Round Array
Paper: Crumb Cake, Very Vanilla, Old Olive
Ink: Cherry Cobbler

Big Shot: Chevron Embossing Folder, Northern Flurry Embossing Folder, Stylish Stripes Embossing Folder
Tools: Simply Scored Scoring Tool, Simply Scored Diagonal Plate, Stampin' Trimmer
Punches: Modern Label, Word Window, Artisan Label, 7/8" Scallop Circle, 1-1/4" Scalloped Circle
Accessories: Season of Style Designer Washi Tape


Stampset: Teeny Tiny Wishes
Paper: Basic Grey, Very Vanilla, Basic Black, Whisper White, Pumpkin Pie, Old Olive
Ink: Pumpkin Pie

Punches: Owl Builder, 1/2" Circle, 1" Circle, Large Oval, Word WIndow, Petite Pennants Builder, Retired Oval, 
Accessories: Witches Brew Designer Washi Tape, Uni-ball Signo Gel Pen